Spring is pretty great, with Spring Boot it is amazing. It's autoconfiguration does all the hard work when working with the framework. We are going to build a couple classes, wire things together, and hopefully have some something cool to show off in our browser.
The Spring Application Context
The Spring Application Context is one of the main features of Spring, it creates and manages the beans. Beans or components are just classes that are serializable, all properties are private (uses getters & setters), and have a public no-argument constructor. The beans are connected together using dependency injection, which is injected as an constructor argument or setter accessor. I wrote in great lengths about DI in my SOLID post.
We may use a couple of beans such as an inventory service and a product service where the inventory service is injected into the product service so the inventory is available to the product. Traditionally this was written in an XML file:
<bean id="inventoryService"
    class="com.example.InventoryService" />

<bean id="productService"
        class="com.example.ProductService" />
    <constructor-arg ref="inventoryService" />
</bean>
A Java based configuration has become more common since Spring 3.0. It uses a @Configuration to indicate it contains Spring bean configurations and @Bean to indicate the method creates a Spring bean.
@Configuration
public class ServiceConfiguration {
  @Bean
  public InventoryService inventoryService() {
    return new InventoryService();
  }
  @Bean
  public ProductService productService() {
    return new ProductService(inventoryService());
  }
}
But these configurations will only be nessecary if Spring is unable to configure the components automatically using autowiring. Spring automatically discovers components with component scanning and automatically injects the appropriate dependancies using autowiring. We will talk more about Spring Boot autoconfiguration below when we mention the @SpringBootApplication annotation.
Initializing Spring
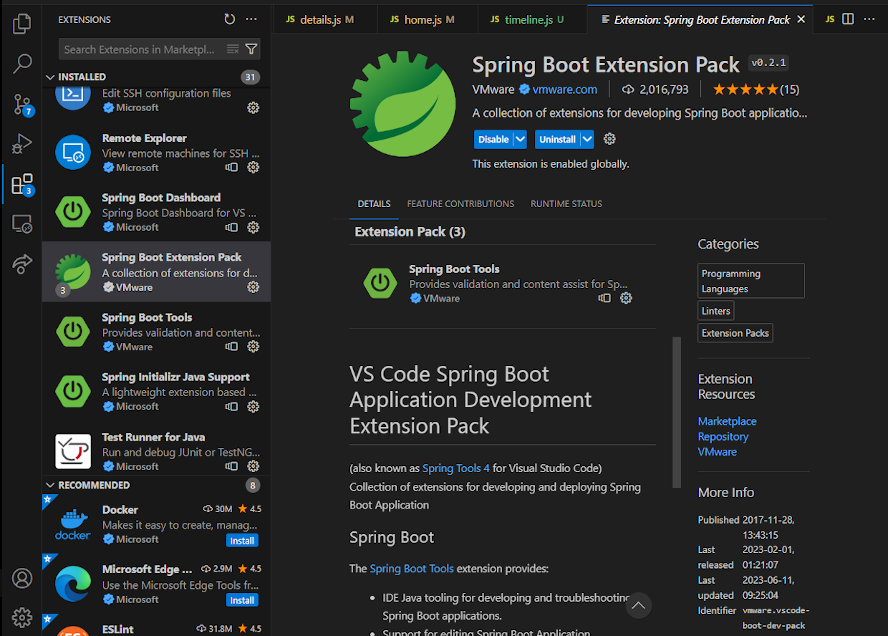
First we need Spring Tools for our IDE. I'm using VS Code, but the tools to help you get started are found on the Spring website https://spring.io/tools/. you can install it on VS Code by going to View > Extensions and searching for Spring Boot Extension Pack.
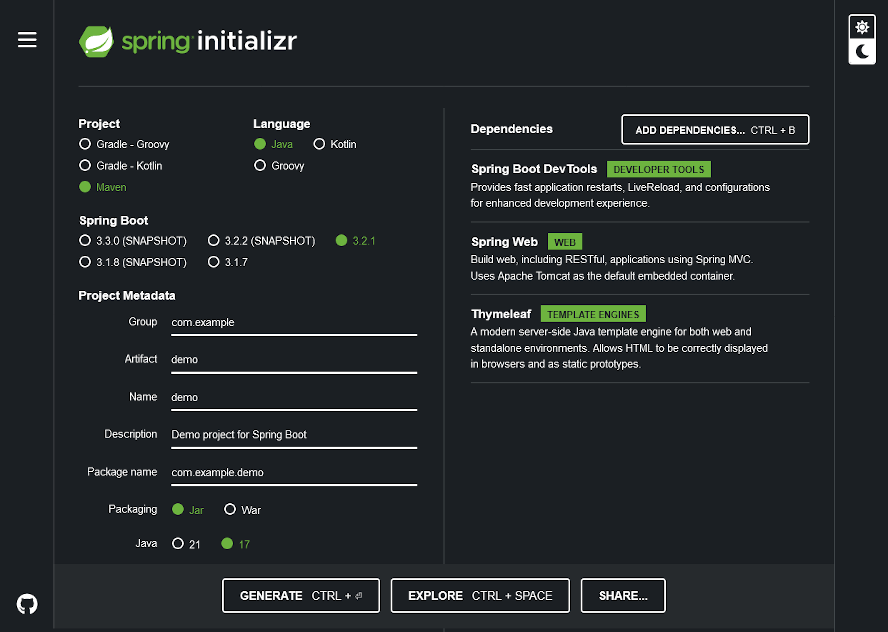
We can use the Spring Initializr from start.spring.io. Add the needed dependancies and generate the starter file. Once downloaded, unzip and open folder in VS Code. There are other ways to initialize the project in VS Code, the docs have that information: https://code.visualstudio.com/docs/java/java-tutorial.
- SpringBoot DevTools - restarts app upon code changes (but not dependencies), disables template caches, refreshes browser with LiveReload
- Spring Web - For building RESTful applications, installs Tomcat
- Thymeleaf - template based framework where the pages are written in HTML, are parsed, and then served.
We are using Thymeleaf because JSP needs a little more configuration to get runnning. JSP needs to built as a WAR file and deployed in servlet container, the views are compiled by the servlet and then able to serve the web content. Thymeleaf is a little more modern and flexible.
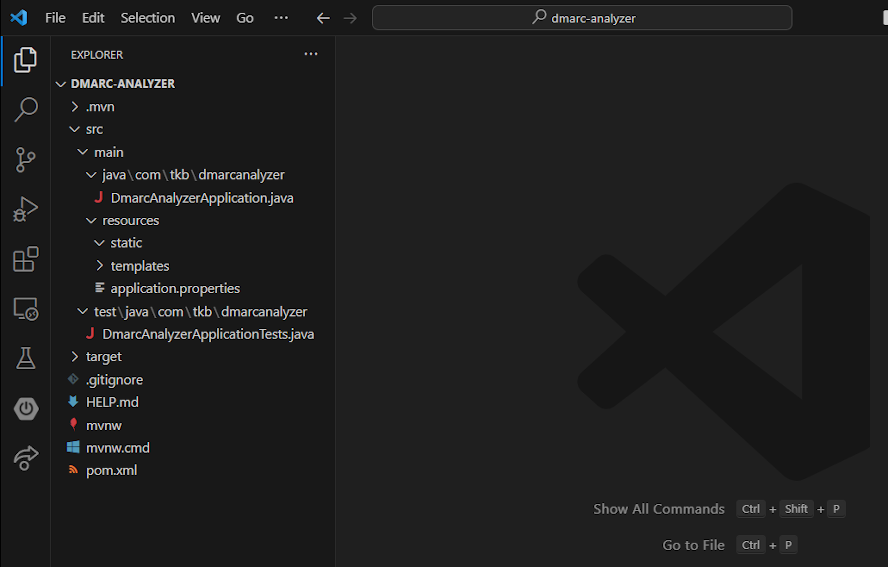
Now we have a project full of files, it's good to have an understanding of the file system.
- .mvn - has the maven wrapper that downloads, installs, and runs Maven distribution.
- java - file that run our application
- static - images, stylesheets, JavaScript, etc.
- templates - html file
- application.properties - specifies environment configuration
- test - test our application using JUnit
- target - has all the output ofa build.
- mvnw & mvnw.cmd - Maven project without having Maven installed and present on the path.
- pom.xml - Project Object Model is the Maven build specification. Lists all the dependancies we made in Spring Initializr.
Working with our sole file in main\java, we see that our DmarcAnalyzerApplication class has a @SpringBootApplication annotation.
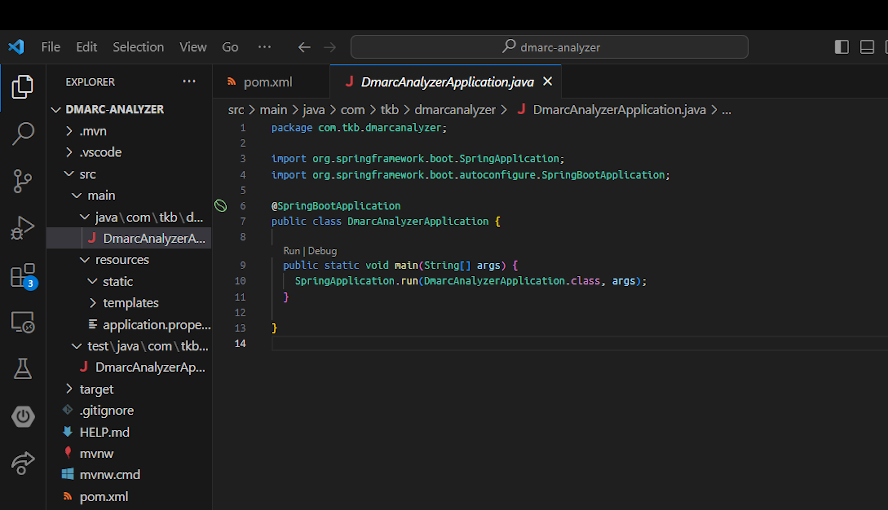
The @SpringBootApplication combines and enables three popular features with thier default attributes:
@EnableAutoConfiguration- enables Spring's autoconfiguration mechanism which works based on your jar dependancies@ComponentScan- enables@Componentscan on the package so Spring can register them as components.@Configuration- allows to register extra beans in the context or import additional configuration classes.
@SpringBootApplication also provides aliases to customize the attributes of @EnableAutoConfiguration and @ComponentScan.
Our main function calls run on the SpringApplication class which bootstraps and creates our Spring Application Context.
We need to create the C in MVC, so create a file in your java\..\..\*projectname* directory named HomeController.java. We are going to need to import the Controller from the sterotype annotations. It's going to indicate to Spring the class is responsible for handling user requests as a bean. Also the mapping getting the home route.
package com.tkb.dmarcanalyzer;

import org.springframework.web.bind.annotation.GetMapping;
import org.springframework.stereotype.Controller;

@Controller
public class HomeController {

  @GetMapping("/")
  public String home() {
    return "home";
  }
}
There are other sterotype annotations, such as @Service and @Repository. A service is to indicate it's class is holding some business logic, and a repository is to indicate it is dealing with CRUD operations. All three, @Controller, @Service, and @Repository annotations are derived from @Component, an annotation to mark beans as Spring’s managed components that are responsible for operations that our scanner will pickup. The Controller sterotype supports all the typical HTTP requests:
- @GetMapping - HTTP GET requests, for Reading
- @PostMapping - HTTP POST requests, for Creating
- @PutMapping - HTTP PUT requests, for Updating
- @PatchMapping - HTTP PATCH requests, for Updating
- @DeleteMapping - HTTP DELETE requests, for Deleting
- @RequestMapping - general purpose request handling
The @RequestMapping is a little different as it can be used at the class and method level, but method level applications prefer to use the other mappings.
Finally we need some html to splash onto the screen. Create a home.html in resources\templates and fill it with any of the starter code you would like.
<!DOCTYPE html>
<html xmlns="http://www.w3.org/1999/xhtml" xmlns:th="http://www.thymeleaf.org">
  <body>
    <h1>Hello, from the DMARC Analyzer</h1>
  </body>
</html>
We can run our application in VS Code and navigate to http://localhost:8080/ to view our starter code.
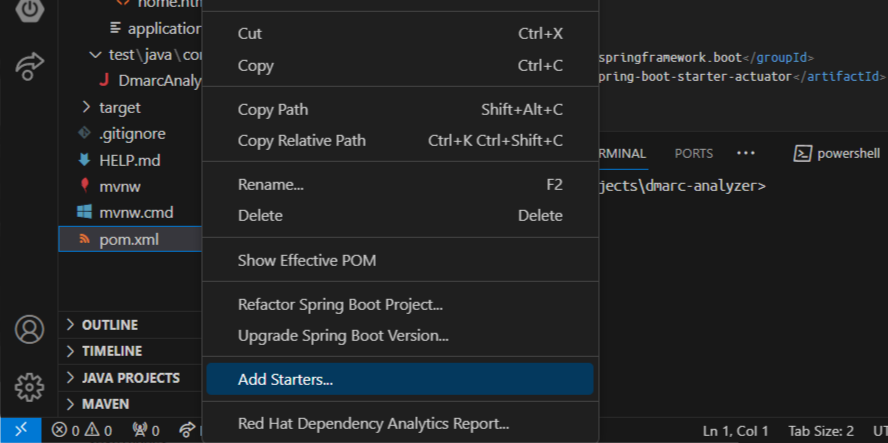
Success! Now we can start building out our application a little bit. We are going to go into our project's root directory, right-click pom.xml, select Add Starters..., and type Lombok. Lombok is going to reduce our boilerplate code.
Time to make some more files, right click java\...\...\*project* and create a new file. We are going to create a class to hold our data. Importing lombok.Data and annotating the class with @Data is the same as having @ToString, @EqualsAndHashCode, @Getter / @Setter and @RequiredArgsConstructor all on the class. Those corresponding function will be available to you.
package com.tkb.dmarcanalyzer;

import lombok.Data;

@Data
public class Record {
  private String ipAddress;
  private String recipient;
  private String fromHeader;
  private String fromEnvelope;

  private String dDomain;
  private String dResult;
  private String dSelector;

  private String sDomain;
  private String sScope;
  private String sResult;
}
With these DMARC records, maybe we want to quiet the noise. After investigating a record and it is found to be safe but something that needs to be looked into, we can add a flag to the record.
package com.tkb.dmarcanalyzer;

import lombok.Data;

@Data
public class Flag {
  private final String name;
  private final String comment;
  private final Type type;

  public enum Type {
    INFO, WARN, ERROR
  }
}
This class is where we are going with our report. It's just going to hold a collection of records we will be generating.
package com.tkb.dmarcanalyzer;

import java.util.ArrayList;
import java.util.List;

import lombok.Data;

@Data
public class RecordReport {
  private List<Record> records = new ArrayList<>();

  public void add(Record record) {
    records.add(record);
  }
}
Now that we have some data models, we can create the controller. The controller is what is going to manage our views and models, so it plays an important task. The real reason we implemented the Flag class was to work with the @ModelAttribute annotation thats going to called whenever a request is handled. We are going to build some existing flags that could be in our "database" and give the option to apply them to a record.
package com.tkb.dmarcanalyzer;

import org.springframework.web.bind.annotation.RequestMapping;
import org.springframework.web.bind.annotation.GetMapping;
import org.springframework.web.bind.annotation.PostMapping;
import org.springframework.web.bind.annotation.ModelAttribute;
import org.springframework.stereotype.Controller;

import lombok.extern.slf4j.Slf4j;

@Slf4j
@Controller
@RequestMapping("/record")
public class RecordController {

  @ModelAttribute
  public void addFlagsToModel(Model model) {
    List<Flag> flags = Arrays.asList(
      new Flag("Microsoft ", "email sent from mobile", Type.INFO),
      new Flag("Hubspot", "HS wants paid dedicated", Type.INFO),
      new Flag("AWS Simple", "ticket in progress", Type.INFO),
      new Flag("MIME", "sent from unknown", Type.WARN)
    );

    Type[] types = Flag.Type.values();
    for (Type type : types) {
      model.addAttribute(type.toString().toLowerCase(),filterByType(flags, type));
    }
  }


  @ModelAttribute(name = "record")
  public Record record() {
    return new Record();
  }

  @ModelAttribute(name = "recordReport")
  public RecordReport buildReport() {
    return new RecordReport();
  }

  @GetMapping
  public String showRecordForm() {
    return "record";
  }

  @PostMapping
  public String processTaco(Record record, @ModelAttribute RecordReport report) {
    report.add(record);
    log.info("Processing record: {}", record);

    return "redirect:/reports/report";
  }

  private Iterable<Flag> filterByType(List<Flag> ingredients, Type type) {
    return ingredients
    .stream()
    .filter(x -> x.getType().equals(type))
    .collect(Collectors.toList());
  }
}
The @Slf4j is a Lombok-provided annotation that, at compilation time, will automatically generate an SLF4J, Simple Logging Facade for Java, Logger static property in the class. It's the same as writing:
public class RecordController {
  private static final org.slf4j.Logger log =
    org.slf4j.LoggerFactory.getLogger(DesignTacoController.class);
}
Class is also annotated with @Controller so it will be used as a bean in the Spring application context.The @RequestMapping annotation, when applied at the class level it specifies the kind of requests that this controller handles. In this case, it specifies that RecordController will handle requests whose path begins with /record. This would also be the place to add an @SessionAttributes("record") if we were going to store model attributes between requests.
When a user lands on /record, it's in the form of a get request. The method annotated with @GetMapping is called, which is showRecordForm(), and returns a string whose value is "record". This tells the controller to render the record.html template, as written below. In addition, Record is called as a @ModelAttribute and sends a blank new Record() to the record.html template to populate the fields as shown below.
<!DOCTYPE html>
<html xmlns="http://www.w3.org/1999/xhtml" xmlns:th="http://www.thymeleaf.org">
<head>
<title>DMARC Analyzer</title>
<link rel="stylesheet" th:href="@{/styles.css}" />
</head>
<body>
  <h1>Record builder</h1>
  <form method="POST" th:object="${record}">
    <p>
      <h3>Meta Data</h3>
      <label>Sender IP:</label>
      <input type="text" th:field="*{ipAddress}"/>
      <br/>
      <label>Recipient:</label>
      <input type="text" th:field="*{recipient}"/>
      <br/>
      <label>From Header:</label>
      <input type="text" th:field="*{fromHeader}"/>
      <br/>
      <label>From Envelope:</label>
      <input type="text" th:field="*{fromEnvelope}"/>
      <br/>
    </p>
    <p>
      <h3>DKIM Results</h3>
      <label>DKIM Domain:</label>
      <input type="text" th:field="*{dDomain}"/>
      <br/>
      <label>DKIM Result:</label>
      <input type="text" th:field="*{dResult}"/>
      <br/>
      <label>DKIM Selector:</label>
      <input type="text" th:field="*{dSelector}"/>
      <br/>
    </p>
    <p>
      <h3>SPF Results</h3>
      <div class="grid">
      <label>SPF Domain:</label>
      <input type="text" th:field="*{sDomain}"/>
      <br/>
      <label>SPF Scope:</label>
      <input type="text" th:field="*{sScope}"/>
      <br/>
      <label>SPF Result:</label>
      <input type="text" th:field="*{sResult}"/>
      <br/>
    </p>
    <button>Submit</button>
  </form>
</body>
</html>
With the addition of some HTML to render, you should have something that looks like this:
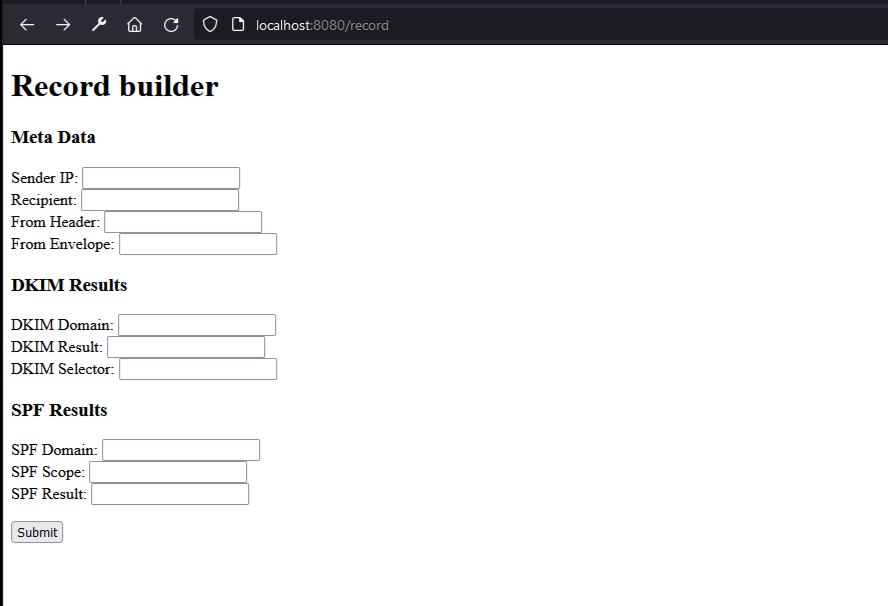
This post has gotten quite long and I want to cover some more things, so I'm pausing this for now and will figure out how to add more later.